


Tips to Break the Thumb Sucking Habit for Older Kids
• August 22, 2022
Thumb sucking: It gets a bad rap in the parenting world, I’ll admit. Many assume that once children start the habit, it’ll become too hard to break.
But speaking from personal experience, thumb sucking isn’t the monster people think it is. In fact, both of my kids were massive thumb suckers starting at a few weeks old. And believe me, I tried hard to get them onto the pacifiers, but they just didn’t take well to them.
I realized after trying to get my oldest son to take a pacifier that thumb sucking is actually a very natural way for children to comfort themselves. When they’re feeling anxious or scared, thumb sucking can be soothing and comforting.
In fact, babies even suck their thumb in utero, so this is a completely natural thing. However, I know that for some children, they need a little more help in breaking the thumb sucking habit, so I’ve compiled my best tips to share with you here.
The Downside of Thumb Sucking
Although thumb sucking is a natural thing, there are a few drawbacks to it, which may add to your desire to help your little one kick the habit.
First, because little kids like to touch everything, there is potential for more germ exposure. Encouraging frequent hand washing is a good practice, and can help establish healthy hygiene for years to come.
Second, if your child sucks their thumb beyond the age of 4, there could be some teeth misalignment as they get their permanent teeth.
And of course, your child could develop calluses on their thumbs from the constant sucking, which could cause discomfort for your little one.
Regardless of the reason for wanting your child to end their relationship with thumb sucking, here are a few tips to try.
Dropping the Habit
Most kids will drop the thumb sucking habit between ages 2-4, as there’s a sense of “peer pressure” with not wanting to suck their thumb in front of their friends.
My children, however, did not drop the habit on their own, so I had to help them. Every child is unique, so you’ll want to take an approach that will work for your child.
Before we dive further in, I want to clarify that these tips are designed to help children who don’t naturally drop the habit by 4 years old.
I’ve talked to many moms who think their 10-month old needs to stop sucking their thumb, but I personally wouldn’t worry about a young child – remember, it’s natural and soothing for infants to suck their thumb. Besides, there’s not a lot you can do to prevent a baby from engaging in this activity – at least not in a way that involves them in the process using gentle methods.
But if your older child needs a little guidance and support in this area, here are tried-and-true practices to help you.
Prep Your Child
The very first thing you want to do when working with your child to break their thumb sucking habit is to prepare them for what’s to come.
Your child needs to be ready to stop sucking their thumb. Forcing your child to do anything rarely works, and when you invite your child to be part of the process, you’ll find it usually works much better.
So follow your child’s lead. Talk to them about the downsides of thumb sucking listed above, and explain how you will work with them to help them stop sucking their thumb. Throughout the process, you’ll want to hold them accountable without pressuring or shaming them.
Introduce a Reward Chart
For some kids, simply discussing thumb sucking will be enough to encourage them to stop the habit. For others, a bit of creativity will be warranted.
When my children were working through stopping the thumb sucking habit, we introduced a rewards chart. We made cut-outs in the shape of a thumbs up and a thumbs down, and whenever they didn’t suck their thumb, they’d get a thumbs up. If they did suck their thumb, they’d get a thumbs down.
After getting thumbs up for a certain amount of days, they’d choose a reward that we’d all do as a family – one of my son’s wanted to go to an amusement park, and one wanted to go to a skate park.
But really, the reward choices are endless.
You can reward your child with stickers, extra time outside, their favorite breakfast, a special treat, or their favorite movie. The reward itself isn’t as important as the fact that it’s something your child wants and is willing to work for.
Sitting down with your child to talk about the reward they’d want for going a certain amount of days without sucking their thumb is a good strategy before beginning. The last thing you want is to try to convince your child to earn a reward they have no interest in.
Hold Your Child Accountable
After talking with your child about thumb sucking and agreeing to a reward that they’ll earn, it’s time to hold your child accountable in a loving, non-shaming way.
As with any habit, it can be hard to break the cycle. Your child may have triggers that cause them to suck their thumb without thought, like going to bed or even watching TV. If you see your child sucking their thumb, gently remind them of their reward.
In some cases, your child may revert back to sucking their thumb after earning their reward, which was the situation with one of my sons.
When he started sucking his thumb again, I didn’t shame him for his actions. I sat down to talk about it with him, and he told me he just really wanted to suck his thumb.
And you know what I did? I let him.
After about a week of continuing to track the behavior on the rewards chart, he eventually stopped.
Shaming or guilting your child isn’t worth it. Stay consistent with making your child aware of the habit when you see it, and remind them of why they started this process to begin with.
Other Ideas to Try
If a rewards chart doesn’t work for your child, or you’d like to try other ideas, here are a few.
- Special nail polish that makes the nails taste bitter. Simply apply it to the finger nails and let it do its work. My youngest actually asked for the nail polish one night to try to break the habit!
- Something to change the texture of the thumb – a thumb guard, sock, glove, or bandaid. Sometimes just having that change in texture is enough to bring awareness to the habit, and your child will stop on their own.
Remember that for some kids, this is a difficult habit to break, as it may also serve as a form of comfort and security. So take your time, follow your child’s lead, and don’t allow anxiety or stress to inform your decisions.
By guiding your child through the process in a gentle and loving way, they will learn how to break the habit without feeling guilt or shame.
I’d love to hear from you after trying some of these tips with your little one! Send me an email at lamis@one2sleep.com sharing how the process went!
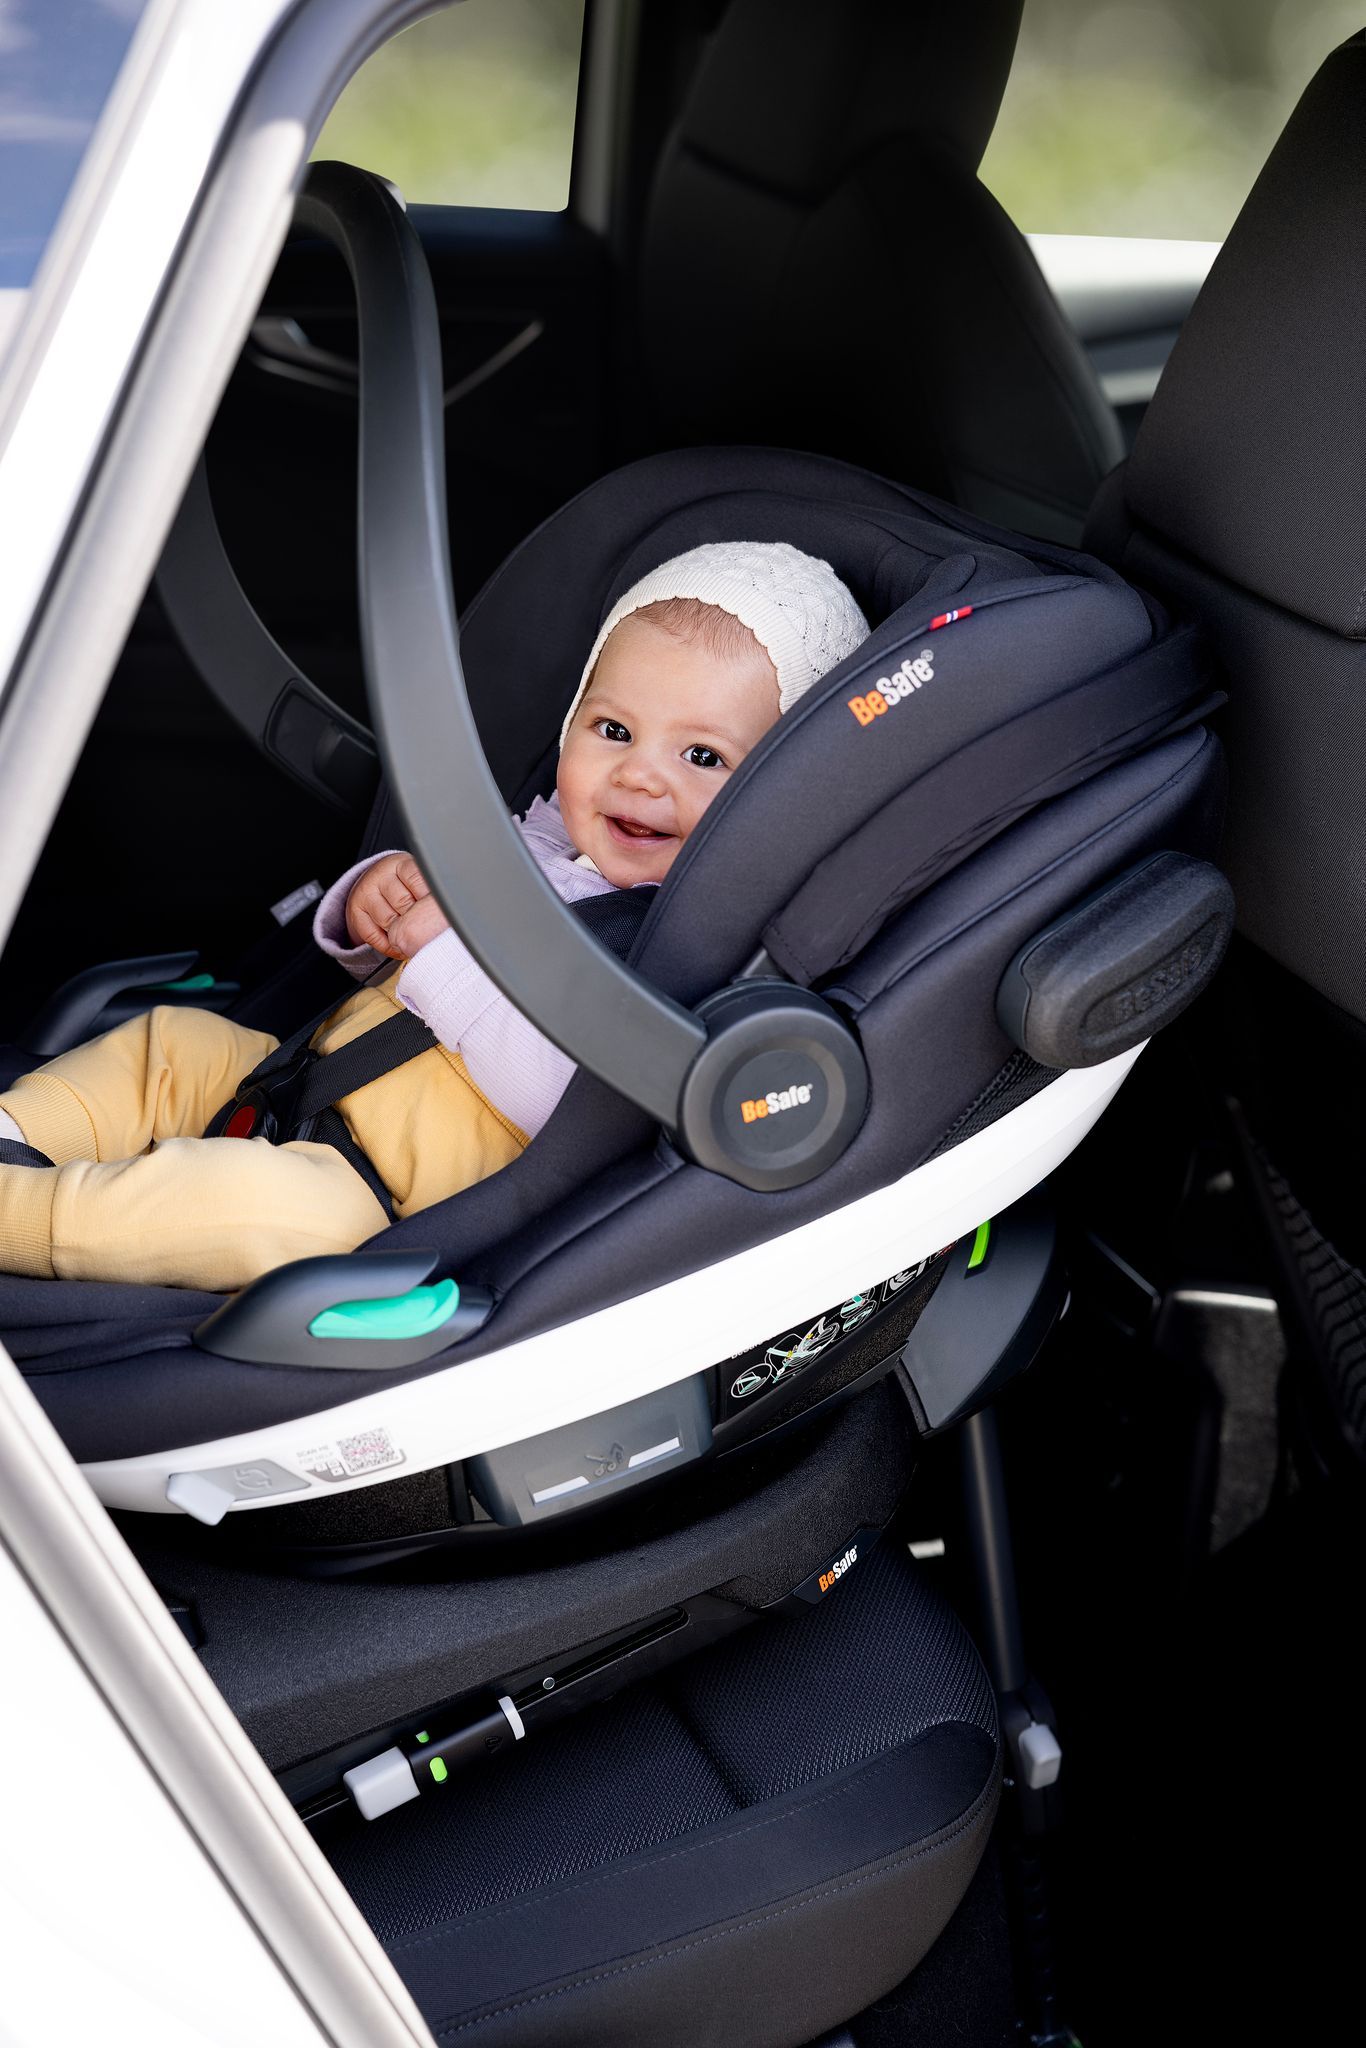
Choosing a car seat is one of the most important decisions you’ll make as a parent. It’s not just about convenience — it’s about giving your child the best protection on every journey . In the UAE, where we drive long distances, face busy roads, and deal with extreme heat, the right car seat matters more than ever. But with so many options, how do you know which one to choose? Here are our top 4 tips to make car seat shopping easier — and safer. 1. PRIORITIZE SEATS THAT UNDERGO THE TOUGHEST CRASH TESTING Not all car seats are created equal. Many parents think if a seat is “legal,” it must be safe — but that’s not always true. ECE R44 : The most basic standard, now phased out in Europe. ECE R129 (i-Size) : Stricter testing with better head, neck, and side-impact protection. The Swedish Plus Test : The toughest crash test in the world — and the gold standard. What makes the Swedish Plus Test so important? It’s the only test that measures neck forces on a child’s body in a crash. Seats that pass prove they can keep neck loads below dangerous limits — a key factor in preventing serious injury. Many car seats fail completely under this extreme test, which shows just how high the bar is. 👉 If a car seat has passed the Swedish Plus Test , you can be confident it offers the highest level of safety for your child. 💡 Remember: Legal does not always mean safe . Go beyond the minimum. 2. CONSIDER YOUR CHILD'S HEIGHT, WEIGHT, AND AGE — EVEN THE SMALLEST ONES Every child grows differently, and size matters when it comes to safety. Preemies and smaller babies : Standard carriers often don’t provide the right fit. They need extra support for the head, neck, and body, plus proper harness positioning. Twins or multiples : Planning seating for two (or more) at once requires careful choice so every child gets the safest setup. As children grow, their height and weight percentiles determine how long a seat will last. We recommend car seats with at least a 25kg weight limit and 125cm height limit , which allow for extended rear-facing travel . Why rear-facing ? Research shows it is up to 5 times safer than forward-facing for children up to 6–7 years old. Better crash force distribution across the strongest part of the body. Superior head and neck protection , preventing the whip-forward motion that can cause spinal injury. Cocoon-like shell protection against front and side impacts. 💡 Bonus for UAE parents: The BeSafe Go Beyond with Preemie Inlay was designed with neonatal nurses to support even the tiniest babies. It features a removable wedge for better harness fit and breathable mesh fabric — keeping your baby safe and cool in our hot weather. 3. MATCH THE CAR SEAT TO YOUR CAR AND LIFESTYLE Your car seat needs to fit not just your car — but your daily routine . Multiple cars? Choose a seat that’s easy to install/uninstall. Growing family? Invest in a seat with a long lifespan that can be passed down. Seat placement? Consider if it will go behind the passenger, in the middle, or side by side with another child seat. Bigger families? Narrow but safe seats can fit 3-across or work well in 7-seaters, without compromising protection. Example from our family setup: Mummy’s car : BeSafe Flex Fix 2 for Sofia (8y) + BeSafe Stretch for Leo (5y). Daddy’s car: Axkid One3 for Leo + BeSafe Flex Fix 2 for Sofia. The Axkid One3 was chosen because Daddy often removes the seat, and installation takes under 30 seconds . 👉 Key takeaway: The “best seat” isn’t the one your friend uses — it’s the one that fits your child, your car, and your lifestyle . 4. DON'T COMPROMISE — BUY FROM A CHILD CAR SEAT SPECIALIST Buying from a specialized retailer ensures peace of mind: They recommend a seat that fits your child, car, and routine . They install it correctly and show you how. If the seat doesn’t fit, they won’t install it — and they’ll help you find one that does. They’ll reinstall it whenever you need , for example when changing cars, at no extra cost. At Safety On Board , we offer 1-1 car seat consultation and hands-on support to make sure your child rides safely every time. FINAL THOUGHTS A car seat isn’t just another baby item — it’s life-saving equipment. Whether you’re bringing home a preemie, juggling twins, or moving a big kid into a booster, the right seat + the right suppor t makes all the difference. If you’re unsure where to start, contact us and book a consultation with us. We’ll help you find the perfect fit for your child, your car, and your family. Because every child in the UAE deserves the safest ride 💛 Sophie Huang is the founder of Safety on Board , the UAE’s first child car seat specialist. She is also a mom of 2 and an internationally certified car seat expert . With a passion for keeping children as safe as possbile on UAE road, she guides parents in choosing and installing the safest car seats. Sophie believes safety can be simple, stress-free, and empowering for every parent.

There’s something magical about a beach holiday — the sound of waves, salty air, and the promise of slow days in the sun. But let’s be honest: traveling to the beach with a baby isn’t exactly a vacation unless sleep is part of the equation. Whether you're heading to a resort, renting a seaside villa, or visiting family by the coast, here’s how to set your baby up for restful sleep — so everyone gets to enjoy that ocean breeze. Step 1: Know That Sleep Needs Don’t Take a Holiday Babies are creatures of habit. Their little bodies thrive on rhythm and predictability — even on vacation. But that doesn’t mean you can’t have fun or go with the flow! It just means that your baby’s sleep needs are still there, and the better prepared you are, the easier it will be to keep things (mostly) on track. Step 2: Your Beach Baby Sleep Packing List Here’s your ultimate baby sleep packing list for a beach trip, broken down by category: Sleep Environment Essentials : Portable travel crib or bassinet – Choose one your baby is already familiar with if possible. Fitted sheets – Bring 2-3 just in case of sand, spills or spit-up. Also bring a gently used one to remind baby of home as he/she adjusts to the new sleep environment. Portable blackout blinds – Beach homes and rentals often have light, sheer curtains. White noise machine or app – Helps block out unfamiliar sounds like waves (yes, they can be loud!) or street noise. Baby monitor (if you’ll be in a larger space or stepping outside during naps). For more on the ideal sleep environment, have a read here . Comfort + Routine : Lovey or comfort object (if age-appropriate and safe for sleep). Sleep sack – Choose a breathable, summer-weight one. Favorite bedtime book – Familiarity brings comfort. Pacifiers – Always bring extras! Nightlight – A soft, warm one if needed for feeds or changes during the night. Weather + Climate Considerations : Lightweight, breathable pajamas – Think cotton or bamboo Fan – If your rental lacks good airflow or AC Bonus Tip: Have a “Nap-on-the-Go” Kit **For beach days that cut into nap time: Clip-on stroller fan Stroller or baby carrier your baby can sleep in Portable white noise machine Extra sun hats + baby-safe sunscreen (for after 6 months old) Step 3: Keep the Routine (Even on the Coast) Try to mirror your bedtime routine as closely as you can. If you usually do bath → PJs → book → feed → sleep, stick with it — even if it’s a quick version. Babies love the predictability, and it helps signal that it’s time to wind down, even in a new environment. Also, aim for naps in a darkened room when possible, especially after a stimulating beach outing. And if one nap has to happen in the stroller under a palm tree? That’s totally okay. Just go back to the routine as soon as you can. Getting There: Travel Day Tips Time your departure around naps if possible Use familiar sleep items (like the sleep sack or pacifier) during flights or drives Offer extra feeds — travel is dehydrating, especially in hot weather Keep expectations flexible – sleep may not be perfect, and that’s fine Beach trips with a baby can be full of joyful memories and restful nights — as long as you plan for sleep. With the right gear and mindset, your little one can stay well-rested and content, giving you more time to soak up the sun (or at least drink your coffee while it’s still warm!). And remember: sleep doesn’t have to fall apart just because you’re away from home. If you ever feel stuck or unsure about how to adjust things before, during, or after a trip, I’m here to help you build a personalized plan that fits your family’s travel style. Book your discovery call here .

October is SIDS Awareness Month, dedicated to raising awareness about Sudden Infant Death Syndrome. It’s a time to educate parents and caregivers on safe sleep practices that can reduce the risk and help protect our little ones.. At Hushabye, safety is at the heart of our brand. Our focus is on providing parents with safe and high-quality baby sleepwear, such as sleep bags, that offer a safer alternative to traditional blankets. What is a baby sleep bag? A baby sleep bag, also known as a wearable blanket or sleep sack, is a specially designed garment for infants and young children to wear during sleep. The primary purpose of a sleep bag is to keep the baby warm and comfortable, but it also serves as a safe and convenient alternative to traditional blankets and quilts in a crib or cot.